
Planning Your Bathroom Remodel
Setting a budget and timeline
Before starting any renovation, it’s crucial to establish a clear budget and timeline. This ensures that unexpected costs are minimized and the project runs smoothly. Professionals can help assess the scope of the remodel and recommend where to allocate resources efficiently.Designing the layout and selecting materials
Once the budget is set, it’s time to design the layout of your new bathroom. Consider the placement of fixtures, plumbing, and electrical elements. Material selection for flooring, tiles, and finishes should align with your overall design and functional needs.
Demolition and Removal
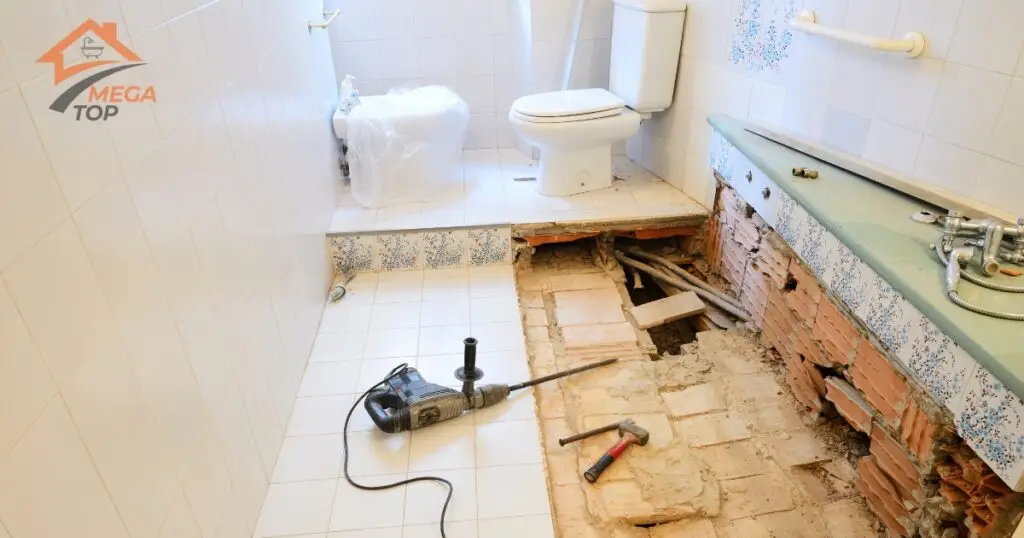
What to remove first in a bathroom remodel
Start by removing items that won’t be reused, such as outdated fixtures, old cabinets, and worn-out tiles. Carefully strip the bathroom to its bare essentials, ensuring plumbing and electrical components are protected during this phase.Precautions for demolition
Demolition can be risky without the right precautions. Always turn off the water supply and electricity to avoid accidents. Professionals know how to safely dismantle bathrooms without damaging essential structures or systems.
Plumbing and Electrical Work
Replacing old pipes and wiring
With the space cleared, plumbing and electrical work should be tackled next. This is the stage where you replace or reroute plumbing pipes and electrical wiring to accommodate your new bathroom design. It’s essential to hire licensed professionals for this step to avoid leaks or electrical hazards.When to upgrade plumbing fixtures
Consider upgrading fixtures like faucets, showerheads, and drains during this stage. Modern fixtures not only enhance aesthetics but also improve water efficiency, saving money in the long term.
Flooring Installation
Best flooring options for bathrooms
Bathroom flooring should be durable, water-resistant, and slip-resistant. Popular choices include ceramic tiles, vinyl, and natural stone. These materials are specifically designed to withstand moisture and provide safety.Should flooring go in before cabinets?
Yes, flooring installation is typically completed before cabinets. This allows for a seamless finish and ensures the cabinets are flush with the floor, preventing uneven surfaces or gaps.
Installing Drywall and Painting
Drywall tips for moisture-prone areas
Installing moisture-resistant drywall, often known as greenboard or cement board, is critical in wet areas like bathrooms. It prevents mold growth and ensures the walls stay intact in humid conditions.Choosing bathroom paint: Waterproof options
Always choose waterproof, mold-resistant paint for bathrooms. These paints are designed to handle the high humidity levels and keep the walls looking fresh and clean over time.
Cabinet and Vanity Installation
When to install cabinets in a bathroom remodel
After the walls are painted and the flooring is done, it’s time to install the cabinets and vanities. This ensures that everything aligns perfectly with the finished walls and floors.Custom vs. prefabricated vanities
Custom vanities allow for a personalized design and can maximize storage in small bathrooms. However, prefabricated vanities are often more budget-friendly and quicker to install, making them a popular choice for many remodels.
Tiling the Walls and Shower
Tiling sequence: Shower or walls first?
Always tile the shower area first before moving to the other walls. This ensures proper water drainage and avoids gaps between the tiles. Professional tilers ensure precision in alignment and grouting for a watertight seal.Grouting and sealing tips
Proper grouting and sealing are key to preventing water damage. Professionals recommend using a waterproof grout and sealant to protect the tiles from moisture intrusion.
Fixture Installation: Toilets, Sinks, and Tubs
Installing a bathtub or shower base
Once the tiling is complete, it’s time to install the bathtub or shower base. This is a meticulous process that involves ensuring proper drainage and a level installation, which prevents future leaks.When to set up toilets and sinks in the remodel process
Toilets and sinks should be installed after the tub or shower. This sequence ensures that all plumbing connections are in place and the fixtures are properly aligned with the plumbing outlets.
Lighting and Ventilation Setup
Choosing energy-efficient bathroom lighting
Proper lighting is essential for both functionality and ambiance. Opt for energy-efficient LED lights, which last longer and consume less power. Consider installing dimmers for adjustable lighting settings.Importance of proper ventilation
Ventilation is crucial in a bathroom to prevent moisture buildup, which can lead to mold and mildew. Installing a high-quality exhaust fan helps regulate humidity levels and prolong the life of your bathroom materials.
Installing Accessories and Hardware
Best time to install mirrors and towel racks
Accessories like mirrors, towel racks, and toilet paper holders should be installed after all the major fixtures are in place. This ensures the accessories are positioned correctly for maximum convenience and aesthetic appeal.Ensuring a cohesive design
Ensure that all hardware and accessories match the overall design of the bathroom. Coordinating finishes, such as brushed nickel or chrome, can give the bathroom a unified, polished look.
Final Touches and Cleanup
Inspection and ensuring quality work
Before declaring the bathroom remodel complete, conduct a thorough inspection to check for any issues like leaks, electrical faults, or improperly installed fixtures. Professionals typically offer a final walkthrough to ensure satisfaction.Final cleaning and readiness for use
The last step is a deep clean to remove any construction dust and debris, leaving your new bathroom fresh and ready for use. Professionals handle this process efficiently, so you can immediately enjoy your newly renovated space.
Compare DIY vs Professional Services
Common Mistakes in DIY Bathroom Remodels
Improper installation leading to leaks
One of the most common DIY mistakes is improper installation of plumbing fixtures, leading to leaks that can cause extensive water damage over time.Overlooked permits and regulations
Many DIYers overlook the need for permits and fail to comply with local building codes, which can result in fines or needing to redo certain elements of the remodel.
Advantages of Hiring Professional Remodelers
Expertise in avoiding costly errors
Professionals have the experience to spot potential problems before they arise, saving you from costly mistakes. They ensure each step is done correctly, from plumbing to finishing touches.Professional tools and experience ensure quality work
Pros use specialized tools and have access to better materials, ensuring a higher quality finish that lasts longer than most DIY attempts.
How Pros Help Save Time and Money
Efficient scheduling and project management
Professional contractors can manage the entire renovation process efficiently, sticking to timelines and coordinating with suppliers to keep everything on track.Avoiding the need for rework
By doing the job right the first time, professionals save you from costly repairs and rework that often plague DIY renovations.
FAQ
Yes, it’s often recommended to install flooring first to ensure a cleaner, more finished look. Consult a professional to avoid potential issues with cabinet fitting.
Plumbing requires expertise and precision, and improper installation can cause leaks. It's safer and more efficient to hire a licensed plumber.
A professional bathroom remodel can take between 2 to 4 weeks depending on the complexity. A DIY project could take much longer and may require professional corrections.
In most areas, permits are required for electrical and plumbing work. Hiring a professional ensures compliance with local regulations.
While DIY may seem cheaper upfront, mistakes can lead to costly repairs. Professionals ensure the job is done right the first time, saving money in the long run.