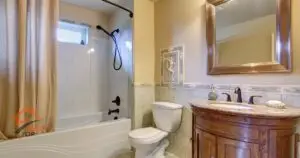
Why You Should Think Twice Before DIY Shower Installation
The idea of saving money by installing your own shower may seem appealing, but DIY shower installation is far more complex than it appears. Shower plumbing involves intricate connections that must be watertight, and any small mistake can lead to significant issues. Some of the most common errors in DIY projects include improper leveling of the shower pan, inadequate sealing, and poor drainage alignment. These mistakes often result in leaks, mold, and costly repairs down the road.
Without professional experience, it’s easy to miss crucial steps that ensure the long-term functionality of your shower. While tutorials and guides provide a basic overview, they can’t fully prepare you for the technical skills required.
Key Steps to Install a Shower Pan Properly
To install a shower pan yourself, it’s crucial to follow each step precisely. The shower pan is a critical component that directs water to the drain and prevents it from leaking into the floor. Here’s a breakdown of the necessary steps:
- Understanding the Shower Pan’s Role: The pan forms the foundation of your shower, sloping towards the drain to direct water flow. It needs to be installed perfectly level to avoid pooling water.
- Prepping the Space for the Shower Pan: Begin by clearing the shower area, removing old materials, and ensuring the subfloor is solid and level.
- Tools You’ll Need for the Installation: Basic tools include a level, measuring tape, trowel, and a mixing tool for mortar. Ensure you have access to plumbing-specific tools like a drain wrench as well.
The Importance of Proper Drainage in Shower Installation
One of the most vital aspects of installing a shower pan is ensuring proper drainage. If the drain is not aligned correctly, water can accumulate under the shower floor, leading to long-term damage.
- How to Install a Shower Drain Correctly: Place the drain at the lowest point of the shower pan, ensuring a smooth, sloping surface around it. Use a flange to secure the drain connection.
- Common Issues with Drainage Misalignment: Poorly aligned drains can cause slow drainage or water pooling in your shower, which can eventually lead to mold growth or even structural damage to the subfloor.
Waterproofing Techniques for Shower Pans
Waterproofing your shower pan is one of the most critical steps in the installation process. Skipping this step or doing it improperly can result in leaks that seep into the surrounding walls and floors.
- Why Waterproofing is Essential: Waterproofing prevents water from penetrating areas outside of your shower, which could cause mold and rot in hidden spaces.
- Best Materials for Waterproofing Your Shower Pan: Use a waterproof membrane, such as liquid rubber or waterproofing fabric, to ensure your shower pan is entirely sealed.
- Steps to Apply Waterproofing Properly: Coat the shower area with waterproofing material and let it dry completely before installing tiles. Make sure to seal all corners and joints thoroughly.
Tiling Around the Shower Pan: What You Need to Know
Once the shower pan is in place, tiling is the next major step. This process requires attention to detail to ensure that tiles are aligned correctly and that they work with the waterproofing already in place.
- Ensuring Proper Tile Alignment and Spacing: Begin by marking your tile layout on the walls to ensure even spacing and alignment. Use spacers to maintain consistent gaps between tiles.
- Using Waterproof Grout for Added Protection: Regular grout can allow water to seep through over time. Waterproof grout is a better option to ensure long-lasting durability.
- Common Tiling Mistakes to Avoid: Avoid rushing through the tiling process. One common error is not using a level, which results in uneven tiles. Another is applying too much adhesive, leading to tiles shifting before they set.
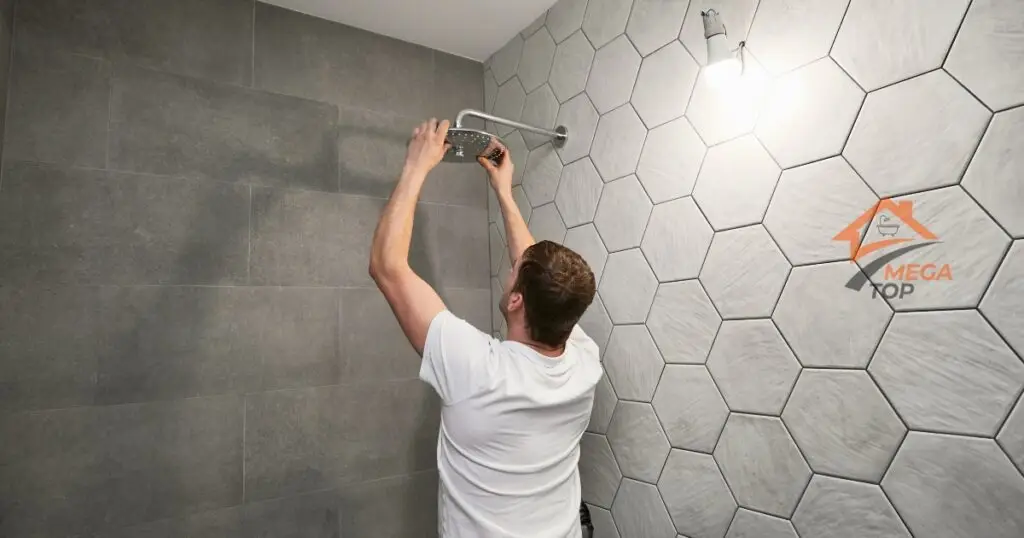
Installing the Shower Valve and Fixtures
Installing the valve and other fixtures requires precise placement to avoid future leaks. It’s important to follow manufacturer guidelines and use appropriate tools to ensure a secure installation.
- Proper Placement of the Shower Valve: The valve should be positioned at a comfortable height, typically between 36 to 48 inches from the floor.
- How to Ensure Secure Fixture Installation: Use plumber’s tape on all threaded connections to prevent leaks. Tighten the fixtures carefully without over-tightening, which can damage seals.
- Avoiding Leaks Around Valves: Inspect the valve installation thoroughly, testing it for leaks by running water before closing the wall.
How to Check for Proper Sealing
After installing the shower pan and fixtures, it’s essential to check for any signs of improper sealing. A poorly sealed shower can lead to water damage in the walls and floors over time.
- Why Checking Seals is Crucial for Longevity: Over time, seals can weaken, especially if they weren’t applied correctly. Checking them ensures your shower remains watertight.
- How to Identify Early Signs of Leaks: Look for any signs of moisture around the shower base or walls. If you notice pooling water or dark spots in the grout, these could be early signs of leaks.
Cost Considerations for DIY Shower Installations
At first glance, DIY shower installation might seem like a cost-effective option, but the hidden expenses and potential for mistakes can quickly increase the overall cost.
- Comparing DIY vs Professional Costs: While the material costs might be lower when doing it yourself, any errors you make could result in more expensive repairs later on.
- Unexpected Expenses to Account For: Factor in the cost of tools, waterproofing materials, and any replacements for mistakes. It’s also important to consider the value of your time.
Permits and Regulations for Bathroom Renovations
Many homeowners overlook the need for permits when installing or renovating a shower. However, most municipalities require permits for bathroom renovations, especially those involving plumbing work.
- Do You Need a Permit for Your Shower Installation?: Check with your local building department. A permit ensures that your work meets safety standards and avoids issues when selling your home.
- Local Building Codes to Follow: Plumbing and electrical work must adhere to local codes, which are designed to protect both you and future occupants of the home.
How Long Does It Take to Install a Shower Pan?
A key factor to consider when deciding whether to install a shower yourself is the time it will take. While professionals can complete the job quickly, DIY projects often drag out.
- Typical Timelines for DIY vs Professional Installs: Professionals typically install a shower pan in a day or two, whereas DIY installations often stretch into weeks.
- Factors That Can Delay Your Project: Lack of experience, incorrect measurements, and unexpected complications with plumbing can all delay your progress.
What to Do if Something Goes Wrong
Even with careful preparation, things can go wrong during a shower installation. It’s important to know when to troubleshoot on your own and when to call in a professional.
- Fixing Common Shower Pan Installation Errors: If your shower pan isn’t level, you may need to remove it and start over, ensuring proper mortar application and leveling this time.
- When to Call a Professional to Avoid Further Damage: If water damage or leaks have already occurred, it’s best to call a professional to assess the situation and prevent further issues.
The Risks of DIY vs Professional Shower Installation
Choosing to install a shower yourself comes with a variety of risks, from small errors to major complications. Professionals have the experience and knowledge to prevent common problems that arise in DIY projects.
- Potential Hazards of DIY Shower Installs: Mistakes can lead to costly water damage, structural problems, and even health issues from mold growth.
- How Professionals Prevent Installation Issues: Professionals ensure proper leveling, waterproofing, and alignment, which drastically reduces the likelihood of future problems.
Benefits of Hiring a Professional for Shower Installation
While DIY might seem like an adventure, hiring a professional brings guaranteed peace of mind and ensures that the installation will last for years.
- Ensuring Long-Term Durability and Quality: Professional installers use high-quality materials and follow strict procedures, ensuring your shower will be functional and leak-free for a long time.
- How Professionals Save Time and Money in the Long Run: Although hiring a professional may cost more upfront, it can save you the cost of fixing DIY mistakes or dealing with water damage later on.
Compare DIY vs Professional Services
- Why DIY Shower Installations Often Go Wrong: Lack of experience in plumbing and waterproofing leads to improper installations, causing damage over time.
- Real-World Examples of DIY Shower Fails: From incorrect pan leveling to poorly installed valves, there are countless examples of DIY shower installations that have led to expensive repairs.
- How Professionals Guarantee Quality and Reduce Risks: With their expertise, professionals guarantee a proper installation that will stand the test of time, giving you confidence in your new shower.
FAQ
Yes, installing a shower pan can be challenging, especially for beginners. It's essential to ensure proper alignment and waterproofing, which professionals handle with expertise.
Yes, specialized tools like a level, trowels, and a drain wrench are required. Professionals already have the necessary tools and experience to ensure a smooth installation.
Absolutely. A misaligned or poorly sealed shower pan can lead to significant water damage. Hiring a professional ensures everything is watertight and correctly installed.
A professional can typically install a shower in 1-2 days, depending on the complexity. DIY installations often take longer and come with the risk of costly mistakes.
Initially, it may seem cheaper to install a shower yourself, but mistakes can lead to expensive repairs. Hiring a professional ensures the job is done correctly the first time.