How to Make Your Bathroom Waterproof with Expert Bathroom Sealing
Understanding the Importance of Bathroom Sealing
Waterproofing your bathroom is crucial for preventing long-term water damage. Bathrooms are consistently exposed to moisture, and without proper sealing, water can seep into walls, floors, and other structures. This leads to problems like mold growth, rotting wood, and structural damage, which are expensive to repair. Bathroom sealing acts as a protective barrier, ensuring water stays where it belongs, especially in areas prone to leaks, such as showers and around bathtubs.
Types of Bathroom Sealing Materials
There are several sealing materials available, each designed to offer protection against water infiltration.
Silicone-Based Sealants
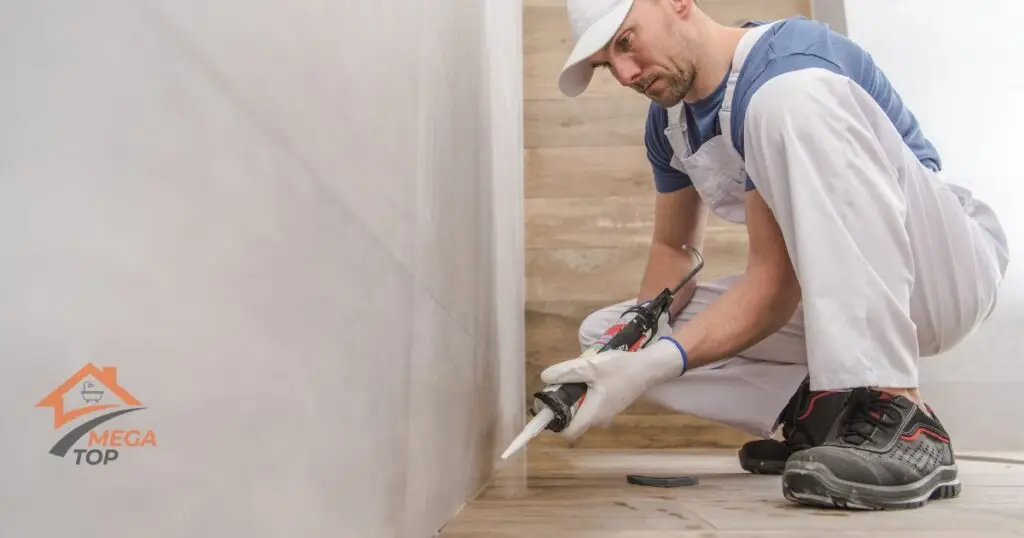
Silicone sealants are one of the most commonly used materials in bathroom sealing. They provide a flexible and waterproof seal around sinks, tubs, and showers. Silicone is ideal for filling gaps and preventing water from penetrating into cracks and joints.
Waterproof Membranes
Waterproof membranes are essential for creating a completely watertight barrier beneath tiles and floors. These membranes can be applied as sheets or liquid coatings and are highly effective in preventing water from seeping into the underlying structure.
Grout and Tile Sealers
Grout is naturally porous, which means it can absorb water if not sealed properly. Grout sealers prevent water from penetrating into the grout lines, and tile sealers provide an additional layer of protection to ceramic or porcelain surfaces.
Step-by-Step Guide to Bathroom Sealing
A successful waterproofing process involves careful preparation and the application of appropriate materials.
Preparing Your Bathroom for Waterproofing
Before applying any sealant, the surface must be clean and dry. Remove old caulk, grout, and any debris to ensure that the new materials adhere properly.
Applying the First Layer of Waterproof Membrane
Start by applying a liquid waterproof membrane to the bathroom floors and walls. This membrane forms the primary barrier between water and the structural components of your bathroom. Be sure to cover the entire surface, paying special attention to corners and seams.
Sealing Shower Walls and Floors
Once the waterproof membrane has dried, you can move on to sealing the shower area. Apply silicone sealant around the joints and corners where walls meet the floor. This ensures no water escapes through any cracks.
Waterproofing Bathroom Walls and Ceilings
Bathroom walls and ceilings are often neglected when it comes to waterproofing, but they are highly susceptible to moisture damage. Using waterproof drywall (also known as green board) and moisture-resistant paint can significantly reduce the risk of water damage.
Protecting Moisture-Prone Areas
Focus on areas around windows, exhaust fans, and light fixtures, as these are prone to moisture buildup. Applying a coat of moisture-resistant paint can prevent water penetration and protect the integrity of your walls.
Sealing Bathroom Tiles and Grout
Tiling is one of the most common surfaces in bathrooms, but without proper sealing, tiles and grout can allow water to seep through.
Importance of Sealing Grout
Grout is especially vulnerable to water absorption. Once the tiles are in place, it’s essential to seal the grout to prevent water from infiltrating beneath the tiles.
Techniques for Applying Tile Sealants
Tile sealants should be applied with a brush or roller, ensuring even coverage across all surfaces. Depending on the sealant used, you may need to reapply it periodically to maintain its effectiveness.
Waterproofing the Shower Area
The shower area experiences the most consistent water exposure in a bathroom, so extra care must be taken to ensure it’s fully sealed.
Ensuring a Watertight Shower
Apply a waterproof membrane before tiling, followed by silicone sealant around all edges, drains, and fixtures. This combination prevents water from entering behind the tiles.
Choosing the Best Sealants for High-Moisture Areas
High-quality silicone and polyurethane sealants are ideal for shower areas due to their flexibility and resistance to mold and mildew.
Bathroom Floor Sealing Techniques
The bathroom floor must be thoroughly waterproofed to avoid water damage to the subfloor and the structure beneath.
Materials for Waterproofing Bathroom Floors
In addition to waterproof membranes, you can use epoxy or urethane-based sealants for a durable finish that prevents water from seeping into the floor.
Step-by-Step Process for Floor Sealing
- Clean the floor thoroughly.
- Apply a liquid waterproof membrane, covering all areas evenly.
- Allow the membrane to dry completely before laying tiles or other flooring materials.
- Seal the edges with silicone or similar materials to create a complete barrier.
Common Mistakes in Bathroom Sealing
While sealing a bathroom may seem straightforward, there are common mistakes that can lead to ineffective waterproofing.
Overlooking Hidden Moisture-Prone Areas
Neglecting areas like the underside of bathroom sinks, behind toilets, and window frames can result in water damage over time. Be sure to seal every possible entry point for water.
Incorrect Application of Sealants
Improper application of sealants can leave gaps and weak points in your bathroom’s waterproofing. Ensure that all sealants are applied evenly and thickly enough to provide a durable barrier.
Maintenance Tips for a Waterproof Bathroom
Proper maintenance is key to keeping your bathroom waterproof over time.
How to Maintain Grout and Sealant Integrity
Regularly inspect your bathroom’s grout and sealants for any signs of wear. If you notice cracks or gaps, reapply the sealant to ensure continued protection.
Signs That Your Bathroom Needs Resealing
If you begin to notice water stains, damp areas, or peeling paint, it may be time to reseal your bathroom. Address these issues promptly to avoid larger problems.
DIY vs. Professional Bathroom Sealing Services
While many homeowners attempt to waterproof their bathrooms themselves, hiring a professional ensures the job is done correctly the first time.
Risks of DIY Waterproofing Mistakes
DIY mistakes often result in incomplete or improper sealing, leading to leaks, mold growth, and expensive repairs down the line. Without the proper tools and expertise, it’s easy to miss critical areas, leaving your bathroom vulnerable to water damage.
Benefits of Hiring Professional Waterproofing Contractors
Professional contractors have the experience and knowledge to apply waterproof membranes, sealants, and tiles correctly. They use high-quality materials and ensure a thorough waterproofing process that will protect your bathroom for years to come.
Real-Life Case Studies of Professional Bathroom Sealing Success
In one case, a homeowner faced recurring water damage despite several DIY attempts. After hiring professionals, the bathroom was fully waterproofed, preventing further leaks and saving thousands of dollars in repairs.
By investing in expert bathroom sealing, you can prevent costly water damage and ensure that your bathroom remains fully waterproof for years to come. Ready to make your bathroom watertight? Contact a professional sealing service today!
FAQ
A professional application of a waterproof membrane combined with high-quality sealants ensures the best results.
While it's possible to DIY, hiring professionals guarantees a thorough and long-lasting waterproofing job.
Sealing should be checked every 2-5 years, especially in high-moisture areas like showers.
Look for mold, mildew, peeling paint, or damp spots in your bathroom as signs of failed sealing.
Professionals ensure proper application, preventing costly water damage and prolonging the lifespan of your bathroom.


