Understanding Bathroom Waterproofing
Bathroom waterproofing is a crucial step in preventing moisture-related damage. Without proper waterproofing, bathrooms can become a breeding ground for mold, mildew, and even structural damage over time. Bathrooms, due to their constant exposure to water, need a well-planned waterproofing system to ensure that water doesn’t seep into walls, floors, or adjacent rooms. Ensuring that key areas, such as walls, floors, and especially the shower, are thoroughly waterproofed helps protect the home from leaks and other costly damages.
Why Bathroom Waterproofing is Essential
Waterproofing helps prevent long-term water damage, including rotting wood, structural weakening, and damage to surrounding rooms. A bathroom with poor waterproofing is susceptible to leaks, which can result in mold growth and expensive repairs. Effective waterproofing ensures that these issues are avoided, and that the bathroom remains a safe and dry space.
Key Areas that Need Waterproofing in a Bathroom
- Shower walls and floors: These areas are constantly exposed to water and must be sealed carefully.
- Bathroom floor and subfloor: Water can seep through tile grout, affecting the subfloor if not properly protected.
- Wall junctions and corners: These areas are more prone to cracks and leaks if not sealed well.
Preparing the Bathroom for Waterproofing
Before starting the waterproofing process, the bathroom surfaces must be thoroughly prepared. This involves removing any previous fixtures, tiles, and materials, and making sure the area is clean and free of dust or debris.
Clearing and Cleaning Surfaces
Surfaces should be stripped back to the bare walls and floor if the bathroom is undergoing a renovation. Any residue from old materials must be removed. If waterproofing a new bathroom, ensure the surfaces are smooth and primed for waterproofing materials.
Identifying Problem Areas
Inspect the bathroom for cracks, holes, or weak spots where water might penetrate. Special attention should be given to the corners of the shower, the edges where walls meet the floor, and areas around drains, as these are common problem zones.
Installing a Waterproof Membrane
A waterproof membrane is an essential barrier that prevents water from penetrating bathroom surfaces. It is applied to both walls and floors and is key to ensuring the longevity of the waterproofing system.
What is a Waterproofing Membrane?
A waterproof membrane is a thin layer, typically made from a rubberized or plastic-based material, designed to block water from reaching the underlying structure of the bathroom.
Types of Waterproof Membranes
- Sheet Membranes: Pre-made sheets that are rolled onto surfaces.
- Liquid Membranes: Applied with a brush or roller, these cure into a solid, rubber-like coating.
Application Process for the Waterproof Membrane
- Apply a primer to the bathroom surfaces to help the membrane adhere.
- Install the membrane on walls and floors, focusing on seams, corners, and joints.
- Use waterproof tape to seal edges and ensure all areas are thoroughly covered.
Sealing Bathroom Walls and Floors
Sealing the junctions between walls, floors, and other structural elements is critical to prevent leaks.
Importance of Sealing Joints and Edges
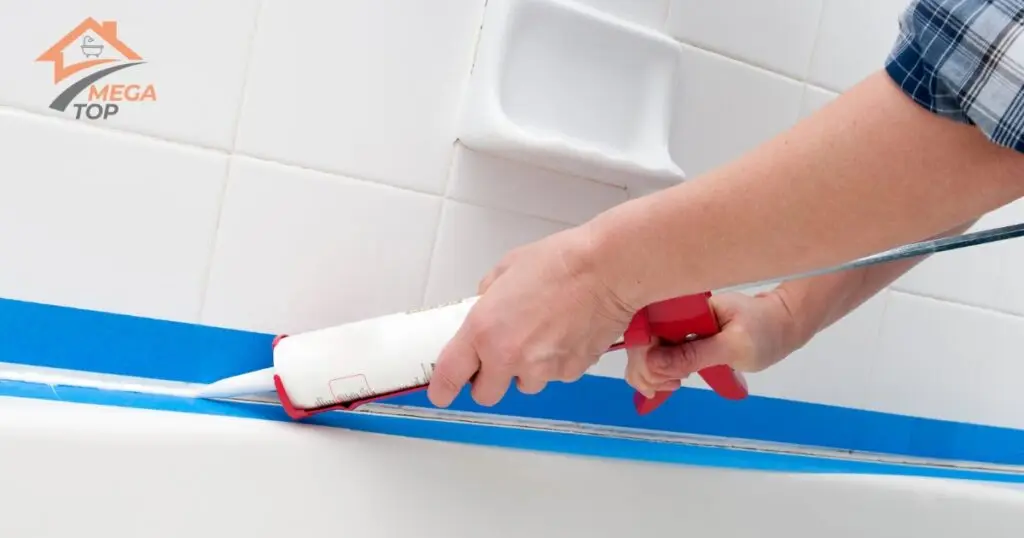
Bathroom edges, especially around corners and where different materials meet (such as tile and drywall), are prone to water seepage. A flexible sealant should be applied along these seams to ensure a waterproof connection.
Applying Waterproof Sealant to Wall and Floor Junctions
Apply a high-quality waterproof sealant around the bathroom floor’s edges and where the walls meet the shower or tub. This ensures that water doesn’t sneak through these areas and cause damage to underlying structures.
Using Waterproof Grout Between Tiles
Tile grout can be a weak point if not sealed properly. Using a waterproof grout prevents water from penetrating through the grout lines, providing extra protection for your walls and floors.
Waterproofing the Shower Area
The shower area is the most critical zone to waterproof, as it deals with direct water exposure every day.
Why the Shower Area is Prone to Leaks
Constant water flow, steam, and temperature changes make the shower one of the highest-risk areas for water damage. Without effective waterproofing, even a small crack or gap can lead to significant leaks.
Step-by-Step Guide to Waterproofing a Shower
- Apply a moisture barrier behind the shower walls before installing tiles.
- Use a waterproofing membrane on both the walls and the floor.
- Seal all joints, including corners and around the drain, with waterproof tape or flexible sealant.
- Ensure proper sloping of the shower floor to direct water toward the drain.
Moisture Barriers and Ventilation
In addition to membranes and sealants, moisture barriers and good ventilation are essential to keep bathrooms dry and prevent mold growth.
Installing a Moisture Barrier Behind Walls
A moisture barrier should be installed behind bathroom walls, especially in the shower area, to catch any condensation or water that might pass through the outer layers.
Importance of Proper Ventilation to Avoid Moisture Buildup
Ventilation is key in controlling moisture levels in a bathroom. Proper venting prevents humidity from accumulating and damaging both the waterproofing system and the bathroom itself.
Waterproofing the Subfloor
Waterproofing the subfloor adds an additional layer of protection, ensuring that water doesn’t seep beneath the bathroom’s flooring materials.
Preparing the Subfloor for Waterproofing
The subfloor must be clean, dry, and stable before waterproofing begins. If the subfloor is damaged or uneven, repairs should be made before applying waterproofing materials.
Applying Waterproofing Layers to the Bathroom Floor
After priming the subfloor, apply a waterproofing membrane or coating, ensuring it extends up the walls a few inches to form a water-tight barrier.
Common Mistakes in Bathroom Waterproofing
There are several mistakes homeowners or inexperienced contractors make that can lead to future problems.
Inadequate Surface Preparation
Skipping the cleaning and priming stages can cause waterproofing materials to fail, leading to leaks down the road.
Skipping Essential Waterproofing Areas
Corners, joints, and seams are often overlooked, but these areas are where water is most likely to seep through. Professional waterproofers ensure that these zones are adequately sealed.
DIY vs. Professional Bathroom Waterproofing
Risks and Common Issues with DIY Waterproofing
DIY waterproofing can seem cost-effective, but common mistakes include improper sealing of joints, use of incorrect materials, and incomplete coverage. These errors can lead to leaks, mold, and structural damage that require expensive repairs.
Case Studies: How Professional Services Ensure Longevity
Hiring professionals ensures that your bathroom is waterproofed using the right techniques and materials. Professionals have the experience to spot potential problem areas and address them effectively. Their work is often guaranteed, giving you peace of mind that your bathroom will remain leak-free for years.
Inspection and Maintenance of Waterproofing
To maintain a waterproof bathroom, regular inspections and maintenance are essential.
How to Inspect Waterproofed Areas Regularly
Check for cracks, peeling, or signs of water damage, particularly in high-risk areas like the shower and the edges of the bathroom. Early detection can prevent minor issues from becoming major problems.
Maintenance Tips to Keep Your Bathroom Leak-Free
Reapply waterproof sealants every few years, keep ventilation fans running during showers, and clean grout lines regularly to ensure water doesn’t penetrate the tiles.
By following the correct steps and using professional services, you can ensure your bathroom is fully protected from moisture and leaks. Contact a professional waterproofing expert today to guarantee your bathroom remains safe and dry for years to come!
FAQ
Bathroom waterproofing prevents leaks, mold growth, and structural damage, saving costly repairs down the line.
DIY waterproofing often misses critical areas, leading to future leaks. It's best to hire professionals for long-lasting results.
When done correctly by a professional, waterproofing can last over 10 years with proper maintenance.
Peeling paint, water stains, mold growth, and damp odors are indicators of failed waterproofing.
Costs vary depending on bathroom size and materials, but investing in professional waterproofing prevents more expensive damage later.


