
Why Replacing a Bathroom Extractor Fan is Important
A properly functioning bathroom extractor fan is crucial for maintaining good air quality, preventing excess moisture, and reducing the risk of mold and mildew. Over time, bathroom fans can become less efficient or break down, leading to poor ventilation. If your fan is noisy, doesn’t remove steam effectively, or you notice lingering moisture, it might be time to replace it. Replacing a bathroom extractor fan can be relatively straightforward, especially with the right tools and guidance.
Is It Easy to Replace a Bathroom Extractor Fan?
Replacing a bathroom extractor fan is generally manageable for homeowners with basic DIY skills. Most fans are designed for simple installation and can be swapped out with minimal changes to the existing setup. However, the ease of installation depends on factors such as the condition of your current wiring, ductwork, and the type of fan you're installing. Knowing the correct steps will ensure the process goes smoothly.
Necessary Tools and Materials for a DIY Installation
Before starting, gather these essential tools and materials:
- Screwdriver (Phillips and flathead)
- Wire stripper/cutter
- Electrical tester
- Pliers
- Drill and bits
- New bathroom extractor fan (with a matching size and CFM rating)
- Duct tape or clamps for securing ductwork
1. Checking the Existing Bathroom Ventilation Setup
Determine the Size and Type of Your Current Fan
Before purchasing a new fan, determine the size of your current unit. Bathroom extractor fans are measured by their airflow capacity, rated in cubic feet per minute (CFM). To properly ventilate your bathroom, you’ll need a fan with a CFM rating that matches or exceeds the square footage of the space (typically 1 CFM per square foot).
- Small bathrooms (under 50 sq. ft.) often require a 50 CFM fan.
- Larger bathrooms (100 sq. ft. or more) may need a fan with a higher CFM rating.
Checking Electrical Wiring and Vent Connections
Once you’ve selected a new fan, check the existing electrical setup. Ensure that the power supply can handle the wattage of the new fan. Also, inspect the venting system to confirm the ducts are in good condition and properly connected to the outside.
2. Step-by-Step Guide to Replacing a Bathroom Extractor Fan
Turn Off the Power and Remove the Old Fan
Safety comes first, so always turn off the electricity at the circuit breaker before starting. Use an electrical tester to ensure no current is flowing to the fan.
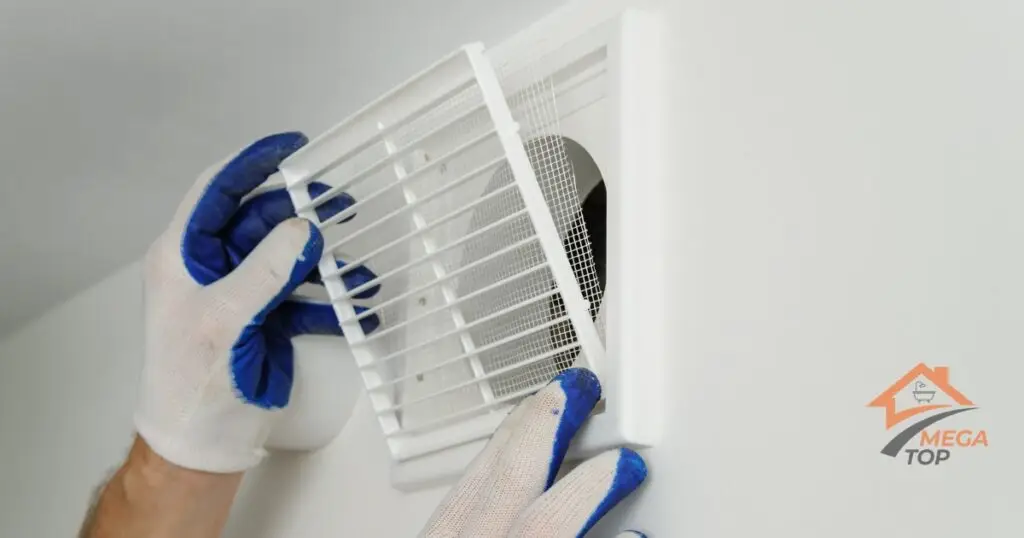
- Remove the fan cover: Gently pull the fan cover down and unplug any light connections, if applicable.
- Disconnect the fan motor: Unscrew the motor assembly from the housing and disconnect the wiring. Note how the wires are connected (color-coded wires: black, white, and ground).
- Remove the housing: If you’re replacing the entire fan unit, unscrew the housing from the ceiling joists and carefully detach it from the ductwork.
Inspecting the Wiring and Ductwork for Issues
Before installing the new fan, inspect the wiring for any damage. If the wiring looks worn or frayed, consider hiring an electrician to rewire the connections safely. Check the ductwork to ensure it is properly sealed and not blocked or damaged.
Installing the New Bathroom Ventilation Fan
Once the old fan is removed, you can begin installing the new unit.
- Mount the new fan housing: Secure the fan housing to the ceiling joists, ensuring it is level and firmly attached.
- Connect the ductwork: Attach the fan’s exhaust port to the existing ductwork using clamps or duct tape to ensure a tight seal.
- Connect the wiring: Match the wires from the fan to the house wiring (black to black, white to white, ground to ground). Use wire nuts to secure the connections and wrap them with electrical tape for safety.
Aligning the Fan with Existing Ductwork
Proper alignment between the fan and the ductwork is crucial for efficient ventilation. Misaligned ducts can reduce airflow and cause the fan to work harder, potentially shortening its lifespan.
Testing and Securing the New Extractor Fan
Once the fan is installed and wired, turn the power back on to test the fan’s operation. Check that the fan runs smoothly, without excessive noise, and that it effectively draws air out of the bathroom. If everything works as expected, attach the fan cover and finish any remaining touches.
- Noise levels: A properly installed fan should operate quietly. Excessive noise may indicate improper installation or a loose connection.
- Airflow: Hold a piece of toilet paper near the fan to check airflow. If the fan isn’t drawing enough air, check for blockages in the duct or poor alignment.
3. Common Mistakes When Replacing a Bathroom Extractor Fan
Replacing a bathroom fan can be straightforward, but several common mistakes can impact the efficiency and safety of the installation.
- Wiring issues: Loose or incorrect wiring can cause the fan to malfunction or even pose a fire hazard. Always double-check connections or consult an electrician if unsure.
- Improper fan sizing: Installing a fan that is too small for the bathroom can lead to poor ventilation, while an oversized fan might create unnecessary noise and use more energy.
How Poor Ductwork Alignment Affects Ventilation
If the fan isn’t properly aligned with the ductwork, airflow can be restricted, making the fan work inefficiently. Ensure the fan is centered and tightly sealed with the duct to prevent leaks and loss of ventilation power.
4. Choosing the Right Bathroom Ventilation Fan
Types of Bathroom Fans: Exhaust, Inline, and Combo Fans
There are several types of bathroom ventilation fans available, and choosing the right one depends on your bathroom’s layout and needs:
- Exhaust fans: The most common type, installed directly in the ceiling to vent air out through the roof or side wall.
- Inline fans: Installed in the attic and vented through ductwork, these are quieter because the motor is further from the bathroom.
- Combo fans: Include additional features like lights, heaters, or humidity sensors, offering a multifunctional solution.
Energy-Efficient and Quiet Bathroom Fan Options
Look for fans labeled as ENERGY STAR-certified for better energy efficiency. Also, pay attention to the fan’s noise level, measured in sones. A lower sone rating (under 2.0) indicates a quieter fan.
5. DIY vs. Professional Fan Installation
While replacing a bathroom extractor fan is a feasible DIY project, there are certain risks involved. If you’re not comfortable working with electrical wiring or cutting into the ceiling, it’s best to hire a professional to handle the installation.
- When it’s easy to install bathroom ventilation yourself: Simple fan swaps with no changes to wiring or ductwork are relatively easy for most DIYers.
- Risks of DIY installation: Faulty wiring, incorrect fan sizing, or improperly sealed ductwork can lead to bigger problems down the road, including poor ventilation or even electrical hazards.
Benefits of Hiring a Professional for Bathroom Ventilation
A licensed electrician or HVAC specialist ensures the installation is done correctly and safely. Professionals can also help assess the overall ventilation needs of your bathroom, suggesting upgrades for better airflow or humidity control.
Additional Bathroom Ventilation Tips
To maintain your new extractor fan’s efficiency, it’s important to keep it clean and perform routine maintenance. Regularly removing dust and grime from the fan cover and motor will prolong its life and improve airflow.
- How often to clean or replace bathroom extractor fans: Clean the fan cover every few months and consider replacing the fan every 8-10 years, depending on use.
- Upgrading to smart or humidity-sensing fans: Smart fans can be programmed to run at specific times or in response to humidity levels, improving energy efficiency and convenience.
Replacing a bathroom extractor fan doesn’t have to be complicated, but it’s important to follow the proper steps to ensure a safe and efficient installation. Ready to upgrade your bathroom ventilation? Contact a professional for expert advice and installation today!
FAQ
Replacing a fan typically takes 1-2 hours for a DIYer, depending on the wiring and ductwork.
You can replace a fan yourself if you're comfortable with wiring, but it’s safer to hire an electrician for complex jobs.
Fan size is based on the bathroom’s square footage. Typically, you need a fan with a CFM rating of 1 CFM per square foot.
Yes, but ensure the ductwork and wiring can support the new fan to avoid overloading the system.
Professional installation ranges from $150 to $350, depending on the fan type and complexity of the job.