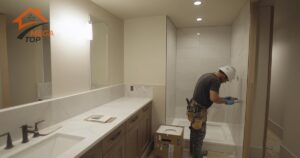
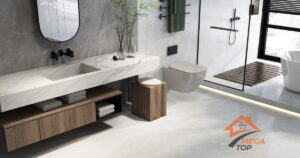
Why Waterproofing Shower Walls is Crucial
Waterproofing shower walls is a critical step in ensuring the longevity and functionality of your bathroom. Without it, water can seep through the walls, leading to costly damage and potential health risks.
The Role of Waterproofing in Bathroom Longevity
- Protects walls and substructures from water infiltration.
- Prevents mold and mildew, which thrive in damp conditions.
Risks of Skipping Waterproofing
- Structural damage to walls, floors, and ceilings.
- Expensive repairs due to rot and water stains.
How Water Affects Shower Walls Over Time
Even a small amount of water can cause significant damage over time if your shower walls are not properly waterproofed.
Common Problems Without Waterproofing
- Mold and Mildew Growth: Moisture trapped in walls creates an ideal environment for harmful fungi.
- Structural Damage: Prolonged water exposure weakens drywall, studs, and flooring.
The Long-Term Costs of Ignoring Waterproofing
- Increased Repair Expenses: Fixing water damage often involves tearing down walls and replacing substructures.
- Reduced Home Value: Persistent water issues can make a home less appealing to buyers.
Best Methods for Waterproofing Shower Walls
Various methods can be used to protect shower walls, each offering unique benefits.
Applying a Waterproof Membrane
Waterproof membranes provide a barrier that prevents water from reaching the underlying wall.
Types of Membranes: Sheet vs. Liquid
- Sheet Membranes: Installed directly over the wall surface, offering consistent protection.
- Liquid Membranes: Painted or rolled onto walls, forming a seamless, waterproof layer.
How to Install a Waterproof Membrane
- Clean the surface to remove dust and debris.
- Apply the membrane according to the manufacturer’s instructions.
- Overlap seams and corners for complete coverage.
Using Cement Backer Boards
Cement backer boards are more water-resistant than traditional drywall and act as a solid base for tiles.
Benefits of Backer Boards Over Drywall
- Resistant to moisture and rot.
- Provides a sturdy foundation for tiling.
Installation Tips for Moisture Resistance
- Use screws specifically designed for backer boards.
- Tape and seal seams with waterproof tape.
Sealing Joints and Edges
Even with waterproof walls, unsealed joints can allow water to penetrate.
Importance of Silicone Caulk and Grout Sealant
- Silicone caulk ensures a watertight seal at corners and edges.
- Grout sealant prevents water from seeping through tile grout.
Steps for Creating a Watertight Seal
- Apply silicone caulk along all joints and edges.
- Use a grout sealant after tiling to protect the grout lines.
DIY vs Professional Waterproofing for Shower Walls
Waterproofing can be done as a DIY project, but professional help may be needed for complex installations.
Steps for a DIY Waterproofing Project
- Gather materials: waterproof membrane, backer board, caulk, and sealant.
- Prep the surface by cleaning and repairing any damage.
- Apply the waterproofing membrane and seal joints with silicone.
Common Mistakes to Avoid
- Skipping proper surface preparation.
- Applying too little waterproofing material.
When to Call a Professional
- Complex Bathroom Layouts: Unique shapes or large showers may require expertise.
- Ensuring Compliance with Building Codes: Professionals can guarantee that the work meets local regulations.
Waterproofing Shower Walls for Different Materials
The method you choose depends on the type of shower wall material.
Tile Shower Walls
- Why Waterproofing Behind Tiles is Essential: Tiles and grout are not waterproof, allowing water to seep through over time.
- Tips for Maintaining Tiled Shower Walls: Regularly reseal grout lines and inspect for cracks.
Acrylic and Fiberglass Shower Walls
- Do Prefabricated Walls Need Waterproofing? Prefab units are generally waterproof but require proper sealing at edges and joints.
- Ensuring Leak-Free Installation: Use silicone caulk to seal connections and corners.
By waterproofing your shower walls, you safeguard your bathroom against water damage and ensure its durability for years to come. Whether you opt for DIY or hire a professional, investing in proper waterproofing is a decision that pays off in the long run. Ready to protect your bathroom? Start your project today!
FAQ
Yes, tiles are not inherently waterproof, and moisture can seep through grout lines.
Without waterproofing, you risk mold growth, structural damage, and costly repairs.
Yes, with the right tools and materials, DIY waterproofing is manageable.
DIY projects cost $100–$500, while professional services start at $1,000.
Using a combination of waterproof membranes, backer boards, and sealants provides the best protection.


