
Understanding Bathroom Sealing
Bathroom sealing involves applying sealant to joints, seams, and edges in your bathroom to prevent water from seeping into areas that could cause damage. It is an essential step in maintaining a waterproof environment in areas like sinks, bathtubs, showers, and around the edges of tiles.
Common Areas for Bathroom Sealing
- Bathtub and Shower Edges: Sealing the edges where the tub or shower meets the wall prevents water from leaking into the surrounding areas.
- Sinks and Countertops: Applying sealant around the sink helps prevent water damage to countertops and cabinets.
- Tile Grout: Sealing the grout between tiles protects it from water damage and mildew buildup.
- Windows and Doors: Ensuring a watertight seal around windows and doors prevents moisture from entering your bathroom from the outside.
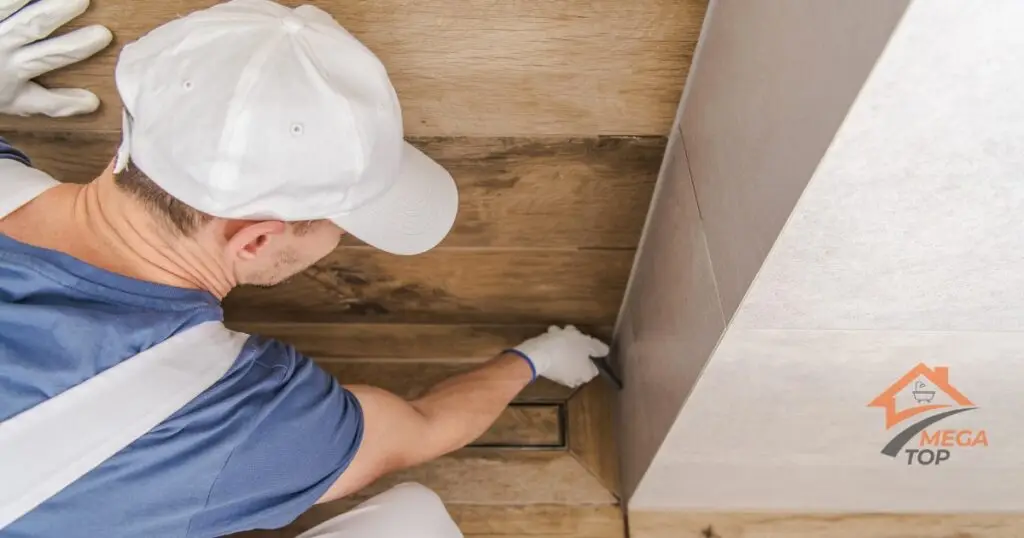
Steps for Bathroom Sealing
1. Preparing the Area
Before sealing, it’s important to clean and prep the area to ensure a strong and lasting bond between the surface and the sealant.
- Clean the Surface: Remove any dirt, soap scum, or old caulk from the area you plan to seal.
- Dry the Area: Make sure the surface is completely dry before applying the sealant to ensure proper adhesion.
- Tape Off the Edges: Use painter’s tape to create clean lines around the area where you’ll apply the sealant.
2. Choosing the Right Sealant
Select a sealant that is waterproof and specifically designed for bathroom use to ensure long-lasting protection against moisture.
- Silicone Sealant: This type of sealant is flexible, durable, and resistant to mold and mildew, making it ideal for bathrooms.
- Acrylic Sealant: Easier to apply but less durable than silicone, acrylic sealants may need to be reapplied more often.
- Colored Sealants: Available in various colors to match your tiles or bathroom decor, providing a seamless finish.
3. Applying the Sealant
Once the area is clean and prepped, you can begin applying the sealant.
Sealing Bathtubs and Showers
- Apply the Sealant: Use a caulking gun to apply the sealant evenly along the edges of the tub or shower.
- Tool the Sealant: Smooth the sealant with a wet finger or a caulk tool to ensure it fills the gaps and creates a neat finish.
- Let it Dry: Allow the sealant to dry for at least 24 hours before using the shower or bathtub.
Sealing Tile Grout
- Clean the Grout: Make sure the grout is free of dirt or mold before applying the sealant.
- Apply Grout Sealer: Use a small brush or spray to apply the sealer along the grout lines.
- Wipe Excess: Wipe away any excess sealer from the tiles to prevent staining.
Benefits of Proper Bathroom Sealing
1. Prevents Water Damage
Proper sealing ensures that water doesn’t seep into the walls, floors, or surrounding areas, preventing costly damage and repairs.
2. Reduces Mold and Mildew
By sealing areas exposed to moisture, you can significantly reduce the risk of mold and mildew growth in your bathroom.
3. Extends the Life of Bathroom Fixtures
Sealing helps protect your tiles, grout, countertops, and other surfaces from moisture-related wear and tear, extending their lifespan.
4. Enhances Aesthetics
Well-sealed edges and grout lines not only protect your bathroom but also give it a clean, finished appearance.
Maintenance Tips for Bathroom Sealing
1. Regular Inspection
Inspect sealed areas regularly for cracks, gaps, or signs of mold, and reseal as needed to maintain a watertight barrier.
- Check High-Moisture Areas: Pay special attention to areas around the bathtub, shower, and sink where water exposure is frequent.
2. Reapply Sealant as Needed
- Silicone Sealant: Typically lasts 5 to 10 years but should be reapplied if you notice peeling or cracks.
- Acrylic Sealant: May need to be reapplied every 2 to 3 years, depending on wear and tear.